
Replacing the carpet in your car is an easy and rewarding job. The first step, obviously, is to purchase that new carpet. The custom fitted carpets sold by the companies that specialize in classic car restorations are very good quality, matching or exceeding the original that came in your Camaro. You will more than likely want to order new carpet pad or underlayment, too, as the old one is likely as bad as the old carpet.
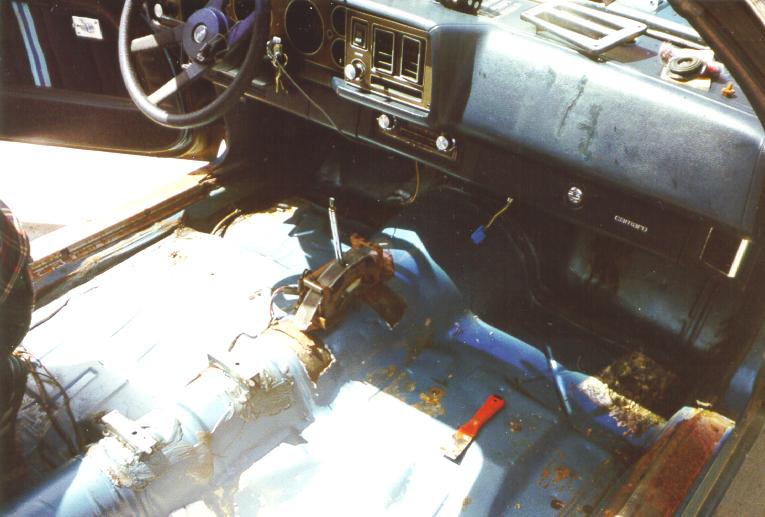
In addition to the carpet, you will need a sharp utility knife, and the necessary wrench to remove your seatbelt bolts. The early Second Generation Camaros came with 13/16" hex head bolts. These are easily removed with a socket wrench. The later cars had a mix of hex-head and T50 torx head bolts. The Torx can get a little ugly to remove if the bolts have rusted or seized into the floor pan. The torx head does not allow for as strong a wrench as the hex style did. First, remove the front seatbelts from the floor on the outside of the seat. Slide the seat fully to the front and remove the bolts from the rear of the track. Then slide the seat to the rear and remove the front bolts. On the later cars with the combination seatbelt and shoulder harness, the bracket at the top of the seat must also be removed to free the harness from the seat. It is attached to the seat with one Phillips screw. Remove that screw and then twist and pry the bracket from the seat. At this point, the seat will come out of the car. Now you can remove the seatbelt ends near the center hump of the floor. The rear seats are removed by pushing rearward and lifting on the lower seat cushion. This disconnects it from the floorpan. The seat back has bolts at the bottom that must be removed. It then lifts upward to disconnect it at the top for removal. Now that you have all the seats out of the car, it is an excellent time to look at the undersides of them for a build sheet. Chevy often put a build sheet in the rear seatback between the cushion and the springs, and sometimes in the underside of the seats.
The rear seatbelts are bolted to the floor with the same style bolts as the front were. Next, you will need to remove the center console. Once it is out of the way, remove the door sill plates, and the old carpet should pull out. Unless your old carpet pad is in good shape, you may want to remove it along with the old carpet and replace both of them. The new carpet can be prepared for installation by laying it outside in the sun to warm it up and relax the folds and creases it got in the shipping box. Once you have the old carpet out and the floorpan cleaned up and ready, put in the new underlayment. Most of these come in multiple pieces, and the suppliers usually give you a drawing to show where all the pieces fit.
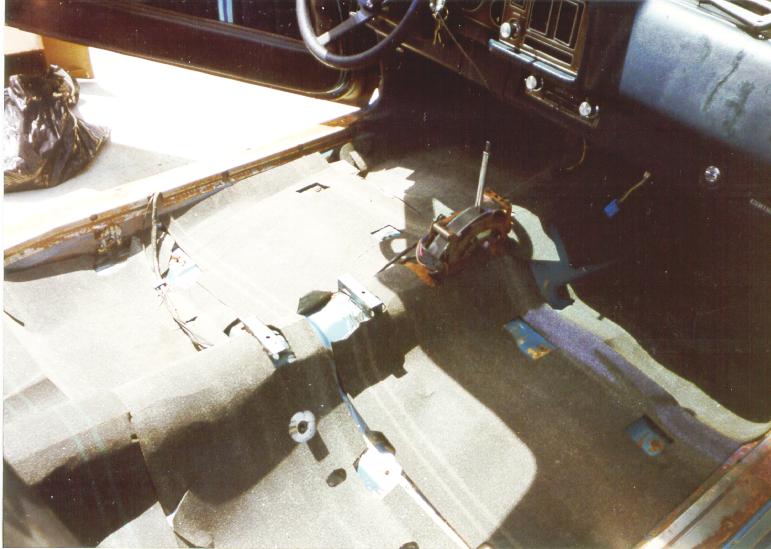
Underlayment
The carpet goes in next. Start from the center and push it down, removing all the creases and folds. A good carpet should be molded to fit the floorpan without much effort. As you work toward the edges, you will notice that the carpet is a bit too large.
Once you are sure you have it laying right and perfectly centered in the car, use your utility knife to carefully trim and fit the edges. Now, put back the door sill plates, the console, and then the seats. Your car will look like new once you finish. A few hours of work will be rewarded with a great looking car.
Second Generation Camaros had the windshields and rear windows installed from the factory with a butyl rope-style seal. This type of seal is almost guaranteed to leak eventually as it dries out and the body flexes from driving the car. The rope-type seal is still available, so you can replace it with an original type seal. Newer cars had their windshields sealed in place with a urethane sealer. This type of seal is much more durable and resistant to leaking. If you are more concerned about making your Camaro watertight than you are concerned about originality, consider the urethane sealer.
We have used an excellent product made by 3M called Windo-Weld Primerless Super Fast Urethane, part #51135-08609. This one solves the problems of leaking windows. It comes in a tube that fits your standard household caulking gun. The best part of the old rope-type seal is that since it didn't seal very well, it also is quite easy to remove without risk of breaking the glass. Before you can remove the glass from your car, you must remove the aluminum window trim that covers the edge of the glass. There is a cheap tool made to remove the window trim. It is available at many auto parts stores and usually costs less than $10. With this tool, you can reach under the trim along the surface of the glass and unhook the clips that hold the trim in place. Take care that you do not catch the point of the tool on the edge of the glass, as it can chip it, and then the glass will break where the chip is.
Once the trim is off the car, you can proceed to removing the glass. If your Camaro has the radio antenna embedded in the glass (almost all 2nd Gen Camaros did), you must first disconnect the antenna lead. It is located at the center bottom of the windshield where the antenna wire ends. You will find a plug attached to a connector on the body. Just pull it upward to disconnect it. Now, if your car has the old rope-type seal, push gently along the edges of the glass from the inside to determine where the glass is already loose and where it is still firmly attached. If the windshield is quite loose, you may be able to push it out at this point. If it doesn't move easily, don't force it. It will break all too easily. The stuck areas can be cut loose with a knife with the blade bent to 90 degrees or by inserting a fine wire through between the glass and the body. Then saw back and forth with the wire to cut the seal. If by some chance your car already has been redone with urethane sealer, the windshield becomes almost impossible to remove without breaking it. It can be done with a sharp utility knife and a lot of patience. Again, too much pressure will result in a broken windshield.
Now, assuming you have suceeded in getting your glass out without breaking it, and you plan to reuse the same piece of glass, you must remove the old sealer from the glass and the body of the car. The old rope type seals can be dissolved with petroleum based solvents. The urethane sealers must be cut away with sharp knives and shaved off the glass with razor blades. As you clean up the body, look for a couple of rubber blocks at the bottom of the windshield. They are used to position the glass at the correct height. If you bought a new rope seal, you will probably have new ones in the box with it. If you are using urethane, you will need to reuse the old ones. So, now your glass is perfectly clean, and you have removed the old seal from the body. If you are installing another rope-type seal, first put the rubber spacer blocks in place where they originally were. Then, you can put the new rope seal in along the same line where the original one was. Start at the bottom of the windshield, so your seam will be where it is least likely to leak. Continue around until you have a complete circle of seal Then set the glass in place and push around all the edges to seal it. You can usually see any air bubbles between the seal and glass. Work them out to prevent leaks. Then snap your trim back in place to complete the job.
If you are using urethane, put the rubber support blocks back where they belong to support the glass, and then put the tube into your caulking gun, snip the tip, and put a continuous bead completely around the edge of the body where you want the glass sealed. A word of warning, this stuff is so good, that if you get any on your hands and it dries there, it will last for weeks. You might want to wear rubber gloves for this part of the job. Then carefully place the glass in position and apply just a little pressure to seal it in place. Too much pressure here will seat the glass too close to the body and then you will have a gap between the glass and the outer trim when it is installed. Don't put the aluminum trim back in place for a day or so, because any urethane that gets on the trim while it is still soft will seal the trim in place permantly so it cannot be removed in the future. Put the trim back on the next day.
There is no real reason to become concerned about this. Your Camaro is still much more rigidly constructed than any car being built today. Front wheel drive cars have no frame under them at all, not even the front half frame your Camaro has. The Unibody design is strong enough unless you use the car for severe duties such as drag racing with large sticky tires on the rear that can lift the front of the car off the ground.
Also, if your car came equipped with T-Tops, it lacks the necessary metal in the roof to keep the body from flexing.
Because your Camaro has a solid full boxed frame under the front half of the car, it is very easy to complete the frame of your car by adding subframe connectors. Subframe connectors are basically an add-on frame extension that tie the front frame of your Camaro to the rear spring perch for the rear suspension. It, in effect, becomes almost a full frame when they are installed.
Subframe connectors are manufactured by a number of companies, and usually sell in the $100-150 range. They come in two types, bolt-in and weld-in. The weld-in type provide more rigidity than the bolt-in type, but the weld-ins become a permanent part of the car. For racing purposes, only the weld-in type will do. For street use, to improve the structural integrity of a T-top car, the bolt-in type can be a major improvement to the car.
We installed a set of bolt-in connectors manufactured by Competition Engineering on a 1980 Z28 with T-tops. The car had been driven hard on the street for over 100,000 miles. The body had sagged in the center enough so that the doors did not close easily anymore, and when parked on uneven ground, they would not close at all. Because the body was sagged in the center, we chose to do the installation on a floor hoist. We supported the car inboard of the front and rear wheels so that when it was lifted, the weight of the ends of the car would return it closer to its original shape and straightness. Then we removed the necessary bolts from the front perch of the rear springs. Once the bolts were out, the subframe connectors were inserted between the springs and the body, and bolted securely into place. The front end of the subframe connectors fits into the rear ends of the front frame of the car. Then holes are drilled through both the connectors and the Camaro frame where they meet.
At this point, we chose to deviate from the installation instructions provided by Competition Engineering. They included bolts that would have reached through both sides of the frame box on each side of the car. This would have somewhat of a crushing effect on the frame box, and our feeling was that it would allow it to loosen and wear with time. Instead, we chose to bolt each sidewall of each frame box independently with shorter bolts. We felt that this will provide better strength over the long haul.
When we completed the task and set the car back on the floor, the difference was immediately noticeable. The doors of the car closed easily again like Chevy intended when they built these cars.
Taking the car for a drive also produced very noticeable differences. Most of the creaking and squeaking of the T-top gaskets was gone. With decreased body flex, the car was quieter, drove better, and is surely a safer car to drive.
If you have a problem with leaking windshield and rear window, you will be happy to know that many of these problems are caused by body flex, and they too will be solved with the installation of subframe connectors. Subframe connectors are a fairly easy way to help preserve your nice Camaro's body.